CHUNG HOW CYONG
Architecture E-portfolio

module teaching objective
computer application
This course will be introducing students to the world of Computer Generated 3-Dimensional drawings. The course will be taught with minimal handouts but there will be lectures and tutorial sessions for the students in order to experiment with the software. Students are advised to practice daily, as only through practice will they be able to understand and master the software. They are also encouraged to carry out self-research in regards to the other capabilities and more complicated features of 3DS Max and Revit Architecture. Students will also be taught the potential of “cross breeding” different softwares, in order to garner the necessary desired results for their visualisation work.

Load 'Window Family Template' and create reference plane.

Create the desired frame size.
Load the family to project.
Load 'Window Family Template' and create reference plane.
corner window progress

Plan.
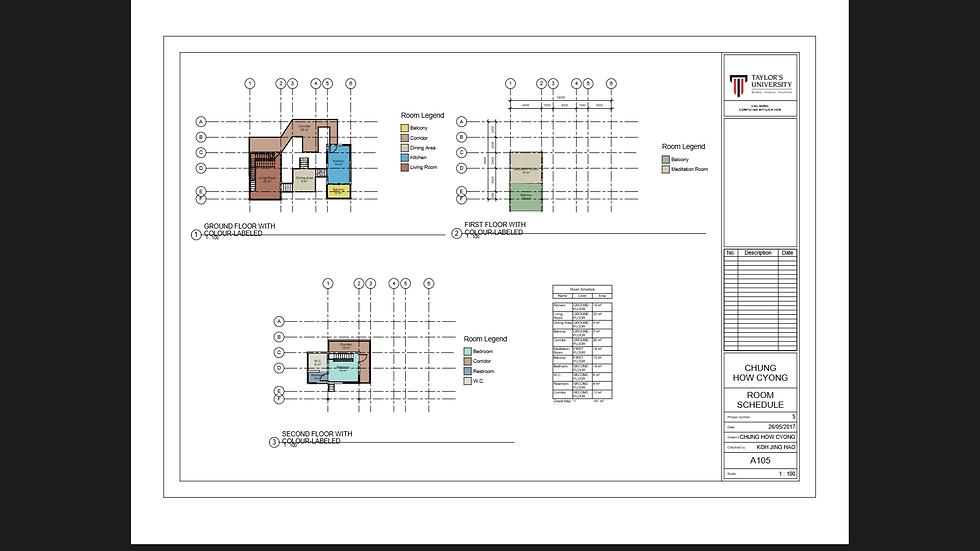
Plan with room-labelled.

Axonometric.
Plan.
Project 1A : Revit Modeling
1. Based on the selected architectural design, you are to generate a Revit model. The model must be compliant with LOD200 requirements (refer Appendix 1).
2. Your Revit model must include at least TWO Revit Family components.
Project 1B : Architecture Drawings Documentation
1. Using the Revit model from Project 1, you are required to prepare building documentation drawings in A1 size containing the following components:
Plans
Elevations
2 Sections
2 Callouts on sections
1 Exploded isometric
1 Room Schedule showing area tabulation
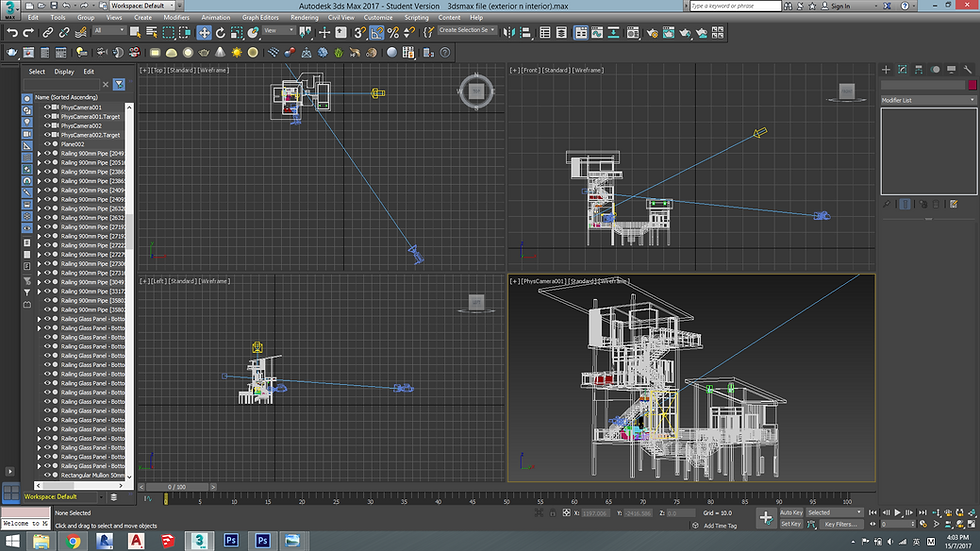
Documentation Progress
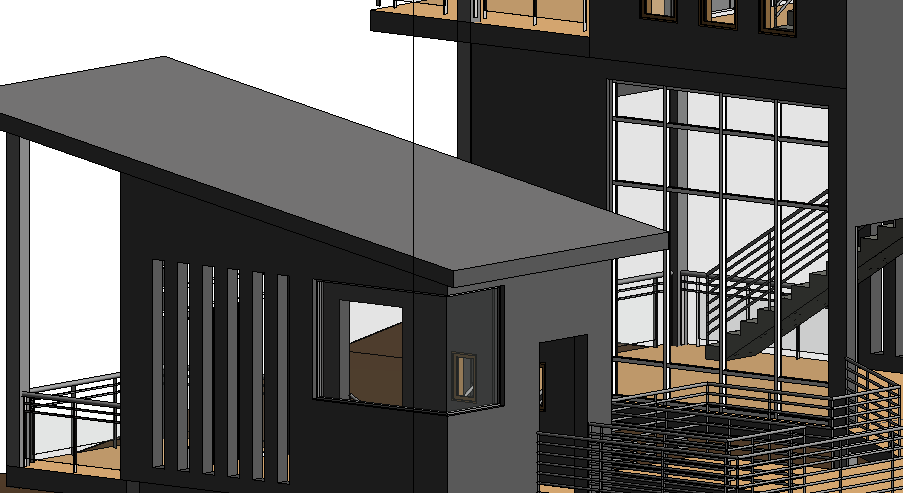
corner window progress
Final Outcome of Project 1: Documentation

Load the window family template.

Create reference plane.

Completed a sliding window.
Load the window family template.

Draw 'Grid Line' to indicate the position of column.

Add 'Level'

Final outcome of project.
Draw 'Grid Line' to indicate the position of column.

Add "New Sheet" and load the title block template.

Edit the title block with correct information.

Use "Display element" to explode the element from its origin point.
Add "New Sheet" and load the title block template.
Project 2A : Exterior Rendering
1. To create materials for 3D objects.
2. To use lights in 3DS Max for exterior and interior rendering.
3. To set up good photographic compositions using cameras in 3DS Max for final rendering.
4. To understand and execute the appropriate rendering settings.
5. To enhance the visual outcome of the renderings using post-production tools.


to bring in the material texture.

to create layering and more realistic effect.

Invert - Desature - Adjust the curve level of image.


to detach surfaces and adjust materials on each face using UVW Map.

to desired intensity and position.

to create better scene.

to set the effect of material.

Save alpha channel before proceed with photoshop editting.


Final Outcome with 3DSmax
Post Production with Photoshop

to desire eye-level.
to desired intensity and position as to bring in natural sunlight to the room.

aligned to curtain wall.
to bring in the material texture.

to detach walls and floor from the rest to add different materials to them without affecting the exterior.

from online source and to add with material texture.


to create more realistic and desire pattern.
Project 2B : Interior Rendering
1. To create materials for 3D objects.
2. To use lights in 3DS Max for exterior and interior rendering.
3. To set up good photographic compositions using cameras in 3DS Max for final rendering.
4. To understand and execute the appropriate rendering settings.
5. To enhance the visual outcome of the renderings using post-production tools.

